Printers on Cornell’s network connect using an Internet Protocol address, more commonly referred to as an IP address. The IP address tells your computer exactly where the printer is on Cornell's network so that you can print to it without being physically near it. An IP address is a series of four numbers separated by periods; an example would be 64.233.191.255. To obtain the IP address for a specific printer, contact ILR Tech Services by submitting a request.
To add an IP printer, perform the following steps.
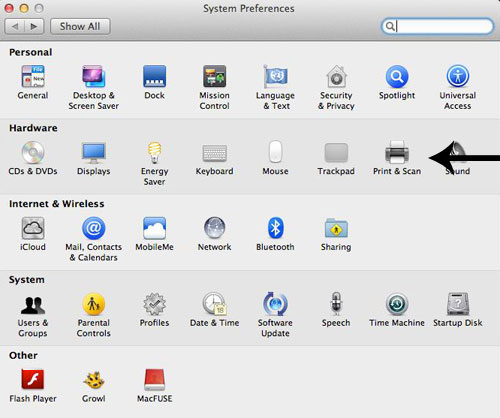
1. Open System Preferences. (If you do not know how to do this, please review the section of this guide titled "How to open System Preferences.")
2. Click on the icon labeled "Print & Scan" under the heading "Hardware."
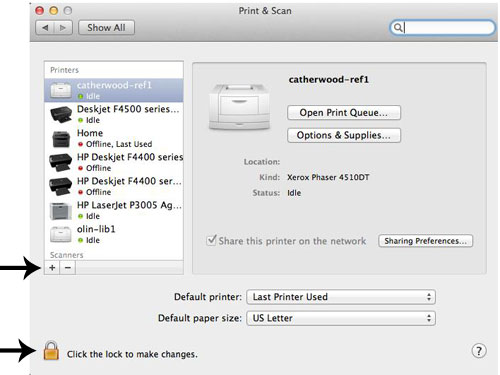
3. Click the lock and provide your computer's login information if prompted, then click the "+" button below the list of printers.
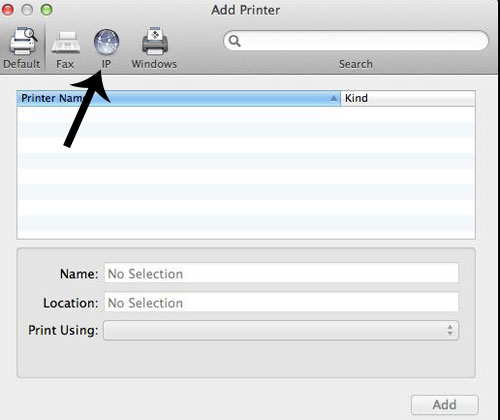
4. In the window that pops up, click the icon labeled "IP."
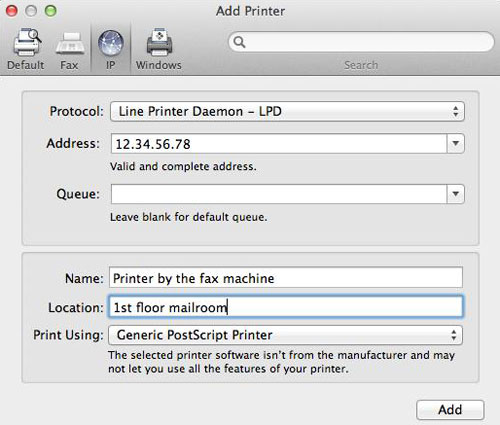
5. In the "Address" field, enter the IP address of the printer you want to add. Leave the "Queue" field blank, and optionally fill in the "Name" and "Location" fields to help you remember where the printer is. Finally, click the "Add" button at the bottom of the window.
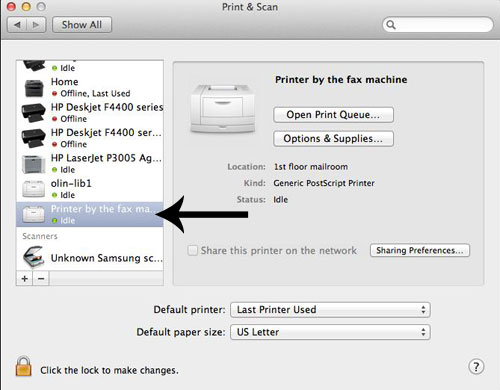
6. If successful, the name of the printer you just added should appear in your list of printers in the left-hand column.
7. You may now close the window.
