There are two options for file backup and recovery for a Mac in ILR. The first is a very robust solution called EZ-Backup for users whose primary computer is the Mac, and should be used when the Mac contains important or valuable information. The second is called Time Machine, and comes standard with every Mac. You should use Time Machine only if your Mac is not the main computer you use to work.
EZ-Backup
EZ-Backup is a service that backs up your computer’s data in a central datacenter.
Install, configure and Run Ez-Backup
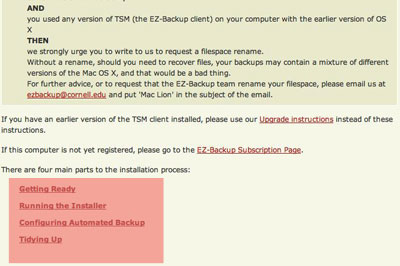
Simply follow the instructions at the bottom of the webpage.
Time Machine
In order to make sure that the files and folders on your Mac are safe from accidental deletion, you will need to use Time Machine. Before you begin, you will need to obtain an external hard drive of at least one terabyte (1 TB).
An example of a 1 terabyte hard drive.
Important: At some point, you will very likely need to unplug the external hard drive from your computer. Before disconnecting the cord that connects your external hard drive and your Mac for any reason, you must first eject the drive if the computer is not fully shut down. To do this, first open a Finder window using the Finder icon in the Dock.
![]()
In the window that appears, find your external hard drive in the left-hand column, then click the eject icon next to its name.
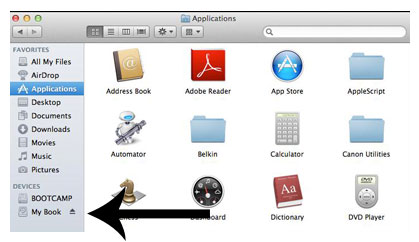
When the external hard drive disappears from the screen, it is safe to unplug it from your computer.
Once you have followed the hard drive manufacturer's instructions for setting up the drive with your Mac, you will be ready to use Time Machine.
Setting up Time Machine
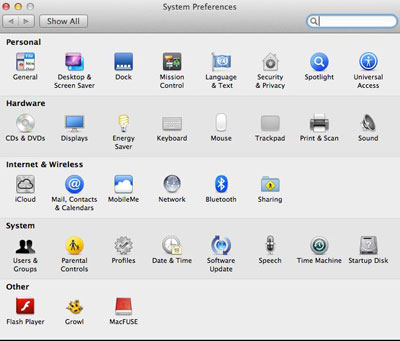
1. Open System Preferences. (If you do not know how to do this, please review the section of this guide titled "How to open System Preferences.") Select the "Time Machine" icon under the "System" heading.
2. In the window that appears, click the "Select Disk…" button.
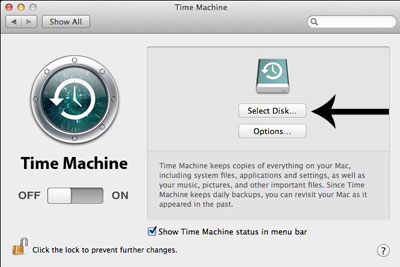
3. Select your external hard drive. If multiple drives appear, it will most likely be the drive with the largest number of gigabytes (GB). Then click "Use Backup Disk."
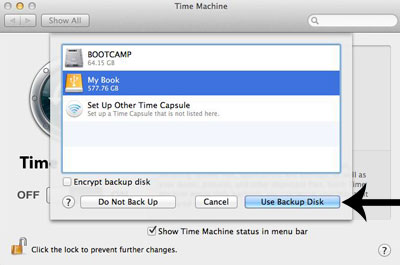
4. You may close the window.
5. To run your first backup, click the Time Machine logo in the Menu Bar at the top of the screen, and then click "Back Up Now" from the drop-down menu that appears. This first backup may take several hours. You may continue working while your computer backs up.
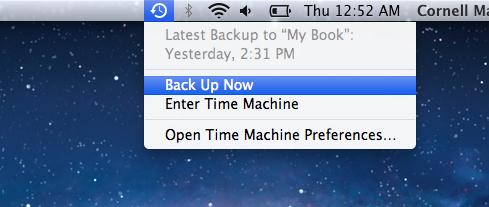
6. Time Machine will conduct automatic backups as long as your external hard drive is plugged into your computer. To unplug the hard drive, first consult the beginning of this section.
Recovering Files Using Time Machine
1. Make sure that your external hard drive is plugged into your Mac. Click the Time Machine logo in the Menu Bar at the top of the screen, and then click "Enter Time Machine" from the drop-down menu that appears.
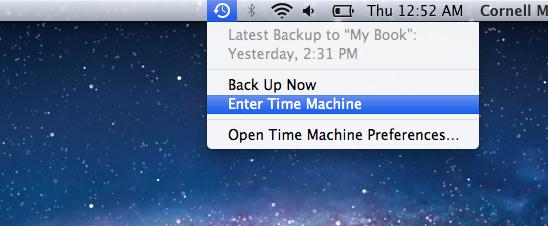
2. Time Machine will show you a Finder window that can be adjusted using the timeline on the right-hand side of the screen. To recover a lost file or folder, first adjust the timeline to a time that you knew the file or folder existed, and then locate the file or folder using the Finder window. The bar at the bottom of the screen will tell you exactly when the backup you're looking at was created. Once you have located what you were looking for, click "Restore" at the bottom right to restore the file or folder to its original location.
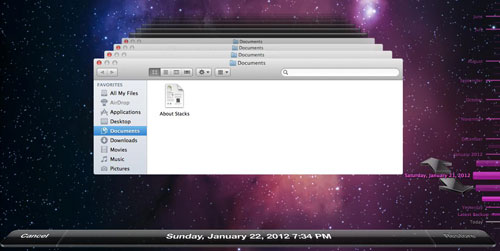
3. To return to your desktop, click the "Cancel" button at the bottom-left corner of the screen.
